Sunday, April 15, 2012

Some bedroom decor

Being back out on my own means I get to decorate again - & this time I don't have anyone to whine about the girlyness. So far, I've put my time, money, & focus into my bedroom since it's where I spent most of my time. I thought I'd share a little of what I have done so far!


Brown floating shelves from Target


Pretty wooden bird from Ross
Red candle part of a set from Pier 1
White frame from Ikea - picture from the Bahamas :)
'07 from my graduation cap
Owl candle from Hobby Lobby


Orange glass bottles from Hobby Lobby 


Paint chip wall art made by me :)
Another red candle from the Pier 1 set
Key from Hobby Lobby


I made these sparkly bad boys. All I did was cover some mason jars with a mix of Mod Podge & loose glitter. I threw some battery-operated tealights in them for now but I'm thinking I want to put flowers or something else pretty in them.


My bedroom/bathroom is set up slightly odd. My toilet & shower are the "bathroom", but I have cabinet space with a sink in my actual bedroom. Therefore, I have to decorate that area to coordinate with the rest of the room.
White sheving unit from Target
Bird from Kirkland's
Candles from Bath & Body Works
Frame from Ross


Thursday, March 8, 2012

DIY Front Door Wreath

After seeing zillions of decorative wreaths on various DIY blogs and pinned all over Pinterest, I decided it was time to make my own after I moved into a new place last month. I took ideas from different pictures I've seen and just went to work and this is what I got:

(Sorry for the bad lighting...I couldn't have picked a worse time of day to take the picture, huh?)


If I said this wasn't time consuming, I'd be lying. Wrapping the styrofoam wreath took at least an hour, which I happily sat on the floor to do as I caught up some recorded TV shows. Then making the individual flowers took me a while because I couldn't figure out what techniques I wanted to use. I ended up making the basic felt roses you can find tutorials for everywhere and the funky sea anenome looking things. I can't seem to find the blog I got the tuturial from, but you can see a similar one here.


After two weeks of leaving felt pieces floating around the apartment and my wood "B" on the kitchen counter drying, I finally finished and made my front door pretty :) ...Now if only I could find a better hook to hang it! I've tried two different ones I had lying around and neither is very effective. Oh well...it'll just be crooked for now!


Thursday, February 16, 2012

DIY Makeup Brush Holder

After ages of storing by makeup bruses in ways that were inconvenient or caused my bruses to lose shape, I finally made a gorgeous makeup brush holder!


All it took was a plain glass container and some pretty, sparkly things from Hobby Lobby. I whipped out my hot glue gun and went to town. The hard part was tracking down those "bean bag filler" beads. After visiting and calling Hobby Lobby, Michael's, and Jo-Ann with no luck, I had to end up ordering them from Amazon. A bag that fit this size container was under $2 - with $5 shipping of course. Ahh, the things we do for the sake of crafting!


I'm in love :)

Nail of the Day [02.26.12]

On nails:
one coat China Glaze "For Audrey"
one coat Sinful "Kissy"
on ring finger - one coat Essie "Shine Of The Times"
one coat Seche Vite top coat


Ignore the dry, cracked cuticles. I'm rough on my hands!


Thursday, September 1, 2011

DIY coffee filter lampshade

Once again, I have recreated a DIY project from the amazing Liz Marie :)
When I first saw these gorgeous lamps shades - made out of coffee filters I knew I had to make some of my own! The plain white lampshades that came with these genie lamps weren't very exciting and were starting to yellow.
Isn't it gorgeous? Looks like a ruffly store-bought lampshade but it's really just a boring lampshade covered in hundreds of coffee filters. Yes, hundreds. After using an unused pack of 200 I had lying around I had to make not one, but two trips back to the store to complete two of these. Plus, I didn't quite know how to make the top look presentable so I fancied them up by adding some crystal gems to the top. I wish I had taken before and after pictures, along with step-by-step instructions, but if you want to know the details, visit Liz Marie's blog post here!

My unorganized nightstand at my previous apartment shared with the ex. But hey, at least the lamp is pretty! :)

Moving out of our apartment and dealing with a breakup after a 2 1/2 year relationship has kind of threw my life out of whack so the DIY projects won't be happening as often now that I don't have my own place to decorate. However, beauty-related posts are on their way!


Don't Waste Your Moolah!

Everyone has those beauty products you get completely psyched to buy, then you get home, try it out, and end up tossing it in the back of a drawer and never using it again. I figured I'd share a few of my regrets with everyone so you don't waste your money too! Everybody's different, so I'm sure there are plenty of people out there who love these products, but these definitely aren't for me!

Hard Candy Glamoflauge heavy duty concealer
Blech. It's no secret that I have horrible dark circles. After hearing countless rave reviews of this concealer, I picked it up from Wal-Mart (double blech.) and gave it a go. This stuff has the consistency of paste. It's thick and gooey and a microscopic dot sized amount could cover my whole face. You might think this is a good thing, but it also has a weirdly yellow tone that gives me kind of a drag queen look, which is totally not what I want. After storing it in the bottom of my makeup case for a few months, I took it out to try again after many nights of no sleep and to my surprise, it had turned in to complete liquid. Just taking the cap off made it run all over the place. Unless you're a drag queen with super yellow undertones, I don't suggest this.

Coconut Pineapple fragrance mist from Bath & Body Works
A few months back I ordered a few things during one of B&BW's huge sales. I'm a huge sucker for anything coconut, and I also love pineapple so I figured I couldn't go wrong with this scent, especially at the discounted price. WRONG. It's super musky and just....not fresh smelling. It's not a bad scent, but it wasn't anything like you expect coconut and pineapple to smell like.

Almay moisturizing eye makeup remover
I have relatively normal skin - a few dry spots from time to time and the occasional oily spot. I figured a makeup remover that moisturizes at the same time would be a good idea. Unfortunately, I turns my face into a disgusting oil slick. I seriously have to wash my face after using this, which totally defeats the purpose. I can't even imagine what someone with oily skin would look like after using this! For now, I'll stick to plain old face wash or eye makeup remover pads or wipes.

Organix nourishing coconut milk anti-breakage serum
With my unruly wavy hair, I'm constantly using flat irons, blow dryers, and curling irons on my locks so I needed something to help mend my fried ends. I've used the coconut milk shampoo & conditioner before, so I thought I'd give this a go because it smells like HEAVEN. (Told you I like coconut!) But, ew. Even the smallest drop worked into the ends leave my hair oily and nasty. I'd rather have the breakage.

NYX Anti-Redness Photo-Loving Primer
For those lovely red patches around the nose, on the chin, and sometimes even on the cheeks that foundation and concealer just don't seem to cover up enough, I decided I'd try out a green primer. I found this on sale at Ulta and gave it a shot. Maybe it's just me, but it doesn't get rid of the redness at all. I like the texture and it's very easy to apply, but it just didn't cover like I was hoping it would.

Tresemme Fresh Start Dry Shampoo
I'm lazy. I don't like to wash my hair too often because it takes SO long to style, so dry shampoo sounded like a dream. Spray on, brush out; instant clean hair. Unfortunately, it didn't work like that. My hair isn't dark, but you can still see the white powder all over my roots even after I've brushed over it a million times. It also leaves my hair feeling really weird - not oily, not greasy...just weird. I'd rather have dirty hair or spend an hour in the hot bathroom with the flat iron.

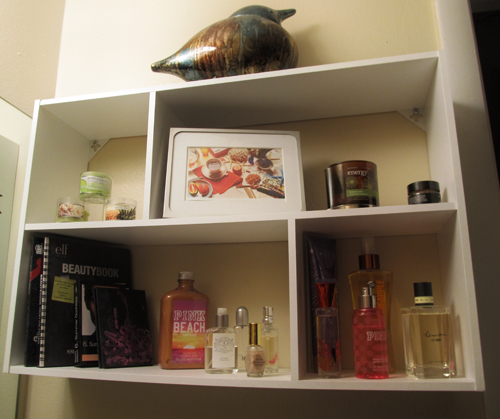
My collection of waste :)
Hope you enjoyed this post and don't go wasting your money on these suck-tastic beauty products!

More blog posts coming soon!

Wednesday, August 17, 2011

My Lovely Wall Art!

This project is by far the most time consuming DIY project I have taken on so far. When I first saw this idea on Jennifer's blog, "Life, Crafts, & Whatever", I thought it would be an easy, inexpensive way to spruce up my bare living room walls. Boy, was I wrong. Not only did this cost much more than I intended, it took forever!


Did you guess what this lovely is made out of? If you guessed paint chips, you're right! I felt like a shoplifter taking hundreds of paint chips from Wal-Mart with no intention of actually buying the paint, but it was worth it when I saw the finish project. So how did I create this unique art?
1. I cut up each individual paint chip to the same size (I don't remember the exact size...but if I did it again I would have been a bigger perfectionist and measured so there weren't half squares at the bottom and spaces on the side. Oh well, it makes it unique!)
2. Using spray adhesive, I glued the chips on a blank canvas one by one. (That stuff smells horrible!)
3. After all the chips were stuck on, I applied 3 coats of Mod Podge to seal those bad boys on good.
4. I used a regular ol' furniture stain and quickly stained over the top to create a more "weathered" look.
5. I didn't like the sides of the canvas being plain white, and the stain didn't darken it enough, so I just painted all the edges with a dark brown fabric paint.

My creation doesn't look nearly as perfect and pretty as the one I stole the idea from, but I like it kind of imperfect...it's more me :)


Another project I did with the intention of going along with my paint chip art were these little lovelies:


Simply canvas covered in scrapbook paper, layers of Mod Podge, some more of the dark brown furniture stain, and that's it.


I intended on hanging these randomly around the other wall art, but I'm considering either scattering them on another wall or setting them on the ledge we have over our kitchen cabinets - I can't decide. The colors of our kitchen/living room are green, orange, and brown so I went with that theme and created six of these, two in each color scheme. To make it look prettier, I could have only put the scrapbook paper on the front and painted around the edges, but that seemed so tedious that I figured this would work just as well.
I got this idea from a different blog, but I feel horrible that I can't give her credit because for some reason I didn't bookmark it!


I have a couple more projects I did in the past few weeks that I'll be sharing soon, so don't forget to follow me! Also, go check out this fantastic blog:


'Til next time...


*These pictures were taken by my lovely friend Bailey! :)